Applying security to API's
During this scenario we will use the Devprime stack security adapter to enable the security settings and we recommend that you have implemented the item Applying Web Security.
To move forward in this scenario, it is essential to have an instance of Keycloak and follow the steps as instructed below:
- Create an instance of Keycloak following the steps indicated.
- Install the Devprime CLI.
- Creating a microservice for use in the “ms-sec-order” demo
dp new ms-order-payment --state mongodb --stream rabbitmq --marketplace payment --init
dp new ms-order-delivery –state mongodb –stream rabbitmq –marketplace delivery –init
-
After completion, you can run the microservice. Then finish.
.\run.ps1 or ./run.sh (Linux, macOS) -
Changing the default microservice port
We will now edit the appsettings.json file available in the ms-payment/src/App folder to configure the web adapter and then the security adapter. Gate the value of the url parameter to avoid port conflict.
|
|
- Open the settings file and include in the security adapter the Keycloak parameters obtained in item 1 of this step-by-step by changing the items “Domain, ClientID / ClientSecret / LogoutUri / Audience”
code ./src/App/appsettings.json
|
|
After completing this stage, the API access security control is already configured. Locate the Payment.cs file in the ms-payment/src/Adapters/Web/ folder to configure the restriction of access to a route in the API. In the example below we will apply to the item “app. MapPost /v1/payment”.
    public override void Endpoints(WebApplication app)
    {
        //Automatically returns 404 when no result
        app.MapGet("/v1/payment" ,[Authorize] async (HttpContext http, IPaymentService Service, int? limit, int? offset, string ordering, string ascdesc, string filter) => await Dp(http).Pipeline(() => Service.GetAll(new Application.Services.Payment.Model.Payment(limit, offset, ordering, ascdesc, filter)), 404));
        //Automatically returns 404 when no result
        app.MapGet("/v1/payment/{id}", async (HttpContext http, IPaymentService Service, Guid id) => await Dp(http).Pipeline(() => Service.Get(new Application.Services.Payment.Model.Payment(id)), 404));
        app.MapPost("/v1/payment", async (HttpContext http, IPaymentService Service, Devprime.Web.Models.Payment.Payment command) => await Dp(http).Pipeline(() => Service.Add(command.ToApplication())));
        app.MapPut("/v1/payment", async (HttpContext http, IPaymentService Service, Application.Services.Payment.Model.Payment command) => await Dp(http).Pipeline(() => Service.Update(command)));
        app.MapDelete("/v1/payment/{id}", async (HttpContext http, IPaymentService Service, Guid id) => await Dp(http).Pipeline(() => Service.Delete(new Application.Services.Payment.Model.Payment(id))));
    }
-
Re-run the microservice and open the url https://localhost:5003
-
Enter the swagger and try to perform a “GET”
-
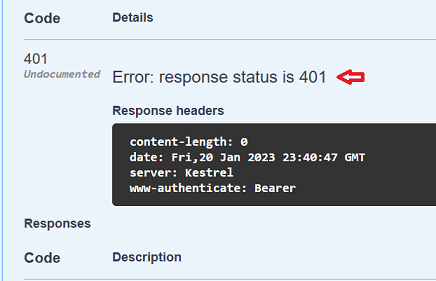
Since security is active, the response will be a 401 indicating lack of permission

-
You can also perform the same test using the curl
curl https://localhost:5003/v1/payment -i
HTTP/1.1 401 Unauthorized
Content-Length: 0
Date: Fri, 20 Jan 2023 23:49:26 GMT
Server: Kestrel
WWW-Authenticate: Bearer
Next steps:
You’ve secured access to a microservice API by using Keycloak.
Congratulations🚀