Deploying microservices using Devprime in Azure Container Apps
Applications based on the DevPrime platform(https://devprime.io) natively incorporate an event-driven architecture approach. They receive external events, process business rules, emit internal events, and, when necessary, propagate the events externally using the Stream adapter, which connects natively with Kafka and other platforms.
Now, we’ll set up a demo involving a microservice called “Order”, which will receive orders. It is essential to upload MongoDB and Kafka containers to perform local testing.
Checklist and preperation of the initial environment:
- Open an account on the Devprime platform and purchase a [(Developer/Enterprise)] license(https://devprime.io/pricing).
- Install an updated version of .NET (Linux, macOS, and Windows)
- Install and/or update Visual Studio Code and/or Visual Studio 2023 Community / Professional / Enterprise.
- Install and/or update docker (For Windows, use WSL2).
- Initialize the MongoDB and Kafka containers on docker and add the ‘orderevents’ and ‘paymentevents’ queue in Kafka.
- Install and activate the latest version of the Devprime CLI.
- Create a folder for your projects and set read and write permissions.
- See the article “Creating the First Microservice” to explore getting started with Devprime.
- An active account in Microsoft Azure.
- The Azure CLI installed and active in the on-premises environment.
- Create an account in Azure CosmosDB and get the connection credentials.
- Create an account in Azure Event Hubs and get the connection credentials.
Creating the first “Order” microservice
We will use the DevPrime CLI for creating the microservices. In this example, we’ll enter the name of the new application, the Stream service type as “Kafka” for asynchronous event emitting, and the State as “MongoDB” for data persistence. To start a new microservice, use the sample command that appears. A new application will be created in seconds and will be ready for production.
dp new order --stream kafka --state mongodb
Adding an Order Business Rule via Devprime Marketplace
dp marketplace order
Running accelerator for implementing code based on the Domain. When you run the command for the first time in this demonstration, type “A” so that you can move forward and make the changes.
dp init
The accelerator automatically implements the classes of “Domain Events” in Domain, “Event Handlers” in Application, “Domain Services” in Application, “Application Services” in Application, persistence in State, APIs in Web and some unit tests in Tests as examples.
Creating a repository in Azure Container Registry (ACR)
We will use Azure Container Registry (ACR) to repository private docker images. You can go to the Azure portal and create a new private repository, or if you prefer, use the Azure CLI and other strategies to provision the resources.
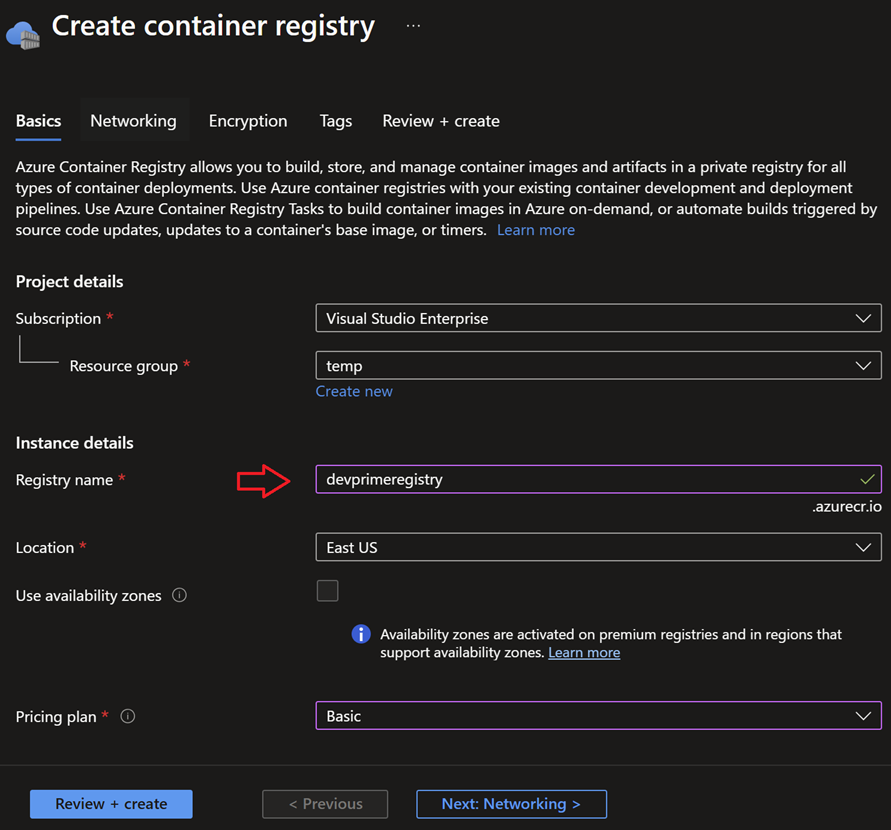
Sign in to the portal and create a new Container Registry. In the example, we use the name “devprimeregistry” and proceed to activate the service.
After creating the ACR, locate the “Settings > Access keys” item and activate the “Admin user” option to obtain the credential that will be used to connect to the Azure Container Registry (ACR) service and publish an image.
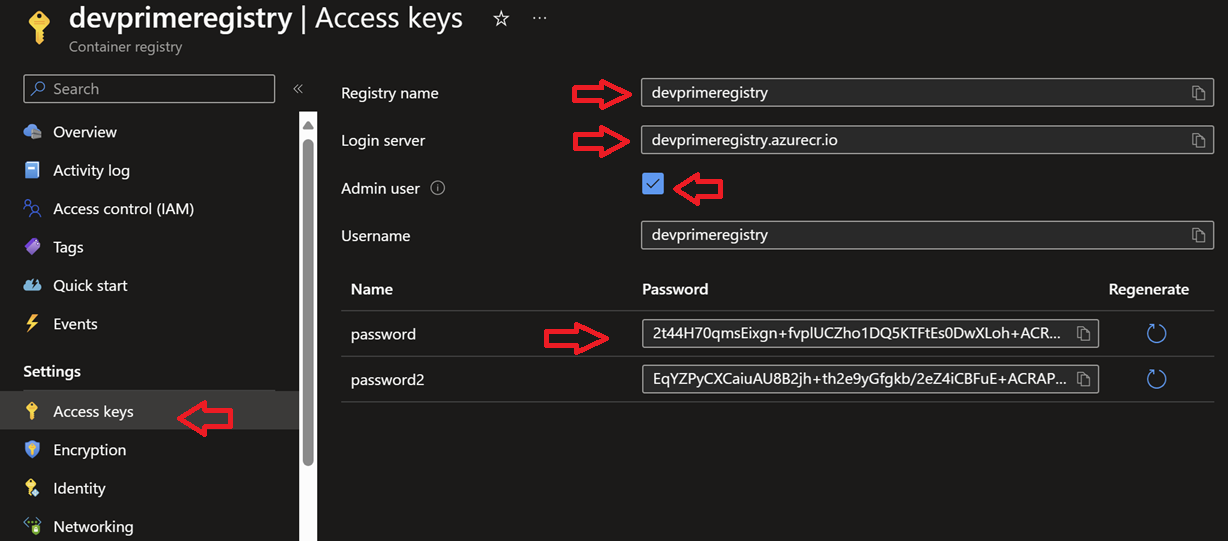
The table below provides a summary of the information required to connect to the Azure Container Registry (ACR) service. It’s important to remember that you must get the data from your Azure portal.
| Key | Value |
|---|---|
| Server | devprimeregistry.azurecr.io |
| Registry | devprimeregistry |
| Username | devprimeregistry |
| Password | 2t44H70qmRDGdBCo |
Logging in to the repository in Azure Container Registry (ACR)
Now it’s time to use the Azure CLI or “az” to log in to the Azure Container Registry created in the previous step and allow you to push docker images from your on-premises environment to ACR. Before moving forward, make sure that you have the Azure CLI enabled (az login) in your environment.
Run from the command prompt:
|
|
Parsing the default port in dockerfile and App configuration
Microservices developed using the Devprime platform are automatically deployed with a dockerfile in the project folder that must be configured if you want to modify the internal port to receive requests. If you want to change it to 8080 or another value, you must change it in the dockerfile and also in the application configuration.
Parsing the default port in the dockerfile
Open via Visual Studio Code:
|
|
|
|
Parsing the default port in the AppSettings file
Open via Visual Studio Code:
|
|
|
|
IMPORTANT:
- The value of the port exposed in the dockerfile must be equal to the value of the port configured in the key
DevPrime_Websent as environment to Azure Container App. - If you modify the dockerfile, you need to publish a new image to ACR.
Running docker Build and creating a
Enter the project folder and run:
|
|
List the local tag in docker:
|
|
Pushing to Azure Container Registry (ACR) repository
Enter the project folder and run:
|
|
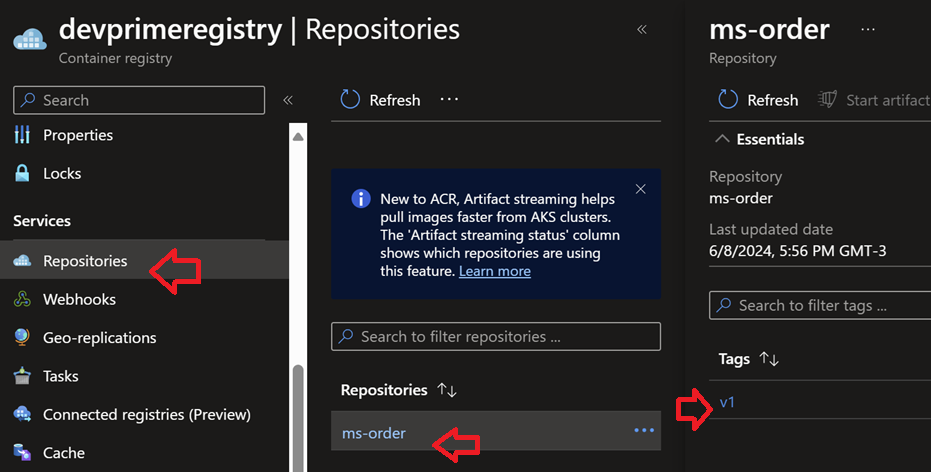
At the end of this procedure, the goal is to be able to view in the Azure Container Registry portal our docker image published in the ACR private docker repository and available for use in Azure Container Apps or any other Azure service, such as AKS.
Exporting environment variables to Azure Container Apps
Azure Container Apps adopts a Kubernetes-based pattern, allowing you to receive application configurations through environment variants, which allows you to use vaults such as Azure Vault to protect credentials and move to the container at the time
of use.
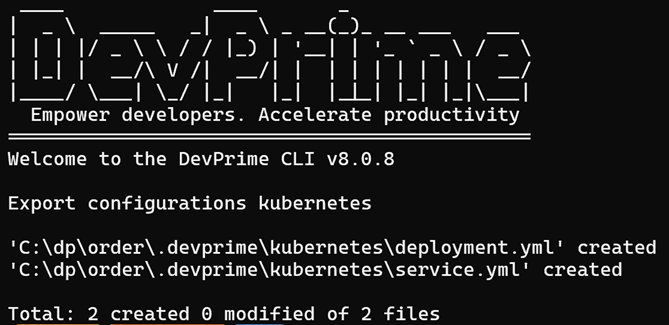
Devprime offers in the Devprime CLI the export command that allows you to generate a yaml file with the variables that should be applied in the production application environment. Use as a reference.
|
|
Open via Visual Studio Code:
|
|
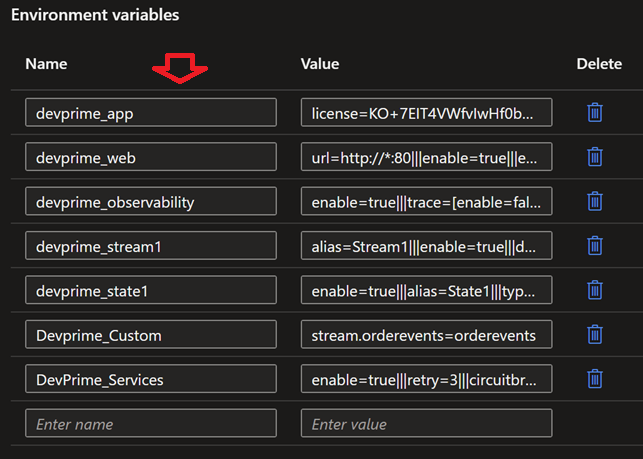
In the image below, you can see the point of the environment variables that we will copy the key and value items that are populated to apply in the environment settings in Azure Container Apps.
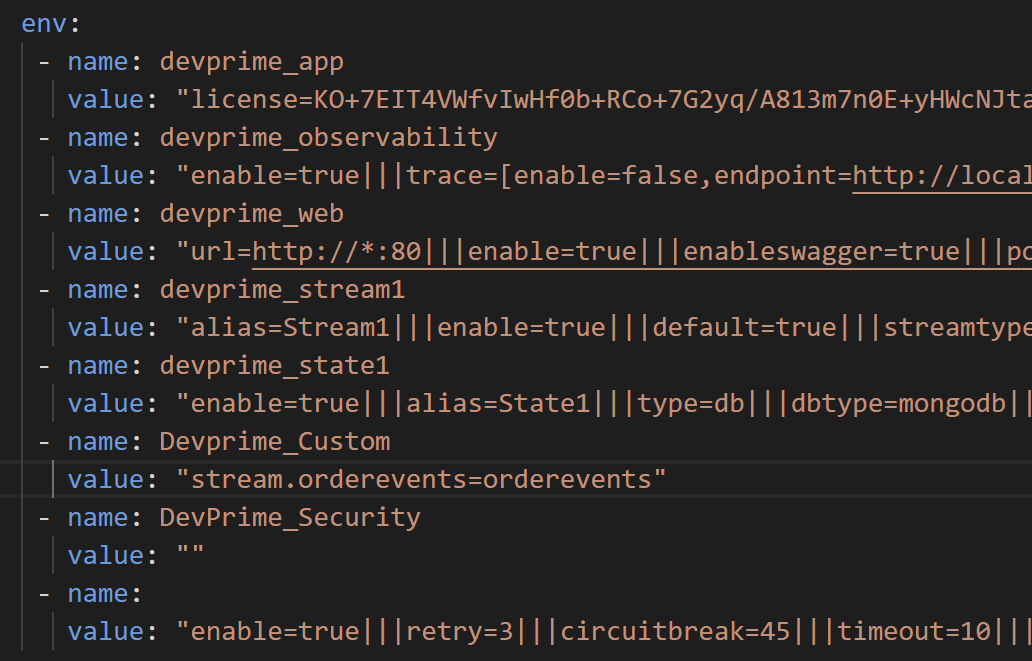
- We’ll use the curly brackets
devprime_app,devprime_web,devprime_observability,devprime_stream1,devprime_state1,devprime_custom, anddevprime_services. The keydevprime_securityis not being used in this project. - It is important to remember that unfilled keys do not need to be used.
- The keys
devprime_stateanddevprime_streammust contain the credentials and references to the production environment, and you can use saved values in Azure Key Vault.
Creating a new Azure Container App
We’ll use the Azure portal to create the Azure Container App. If you prefer, you can use the Azure CLI, Bicep, Terraform, or other tools to replicate the same procedure in your DevOps strategy.
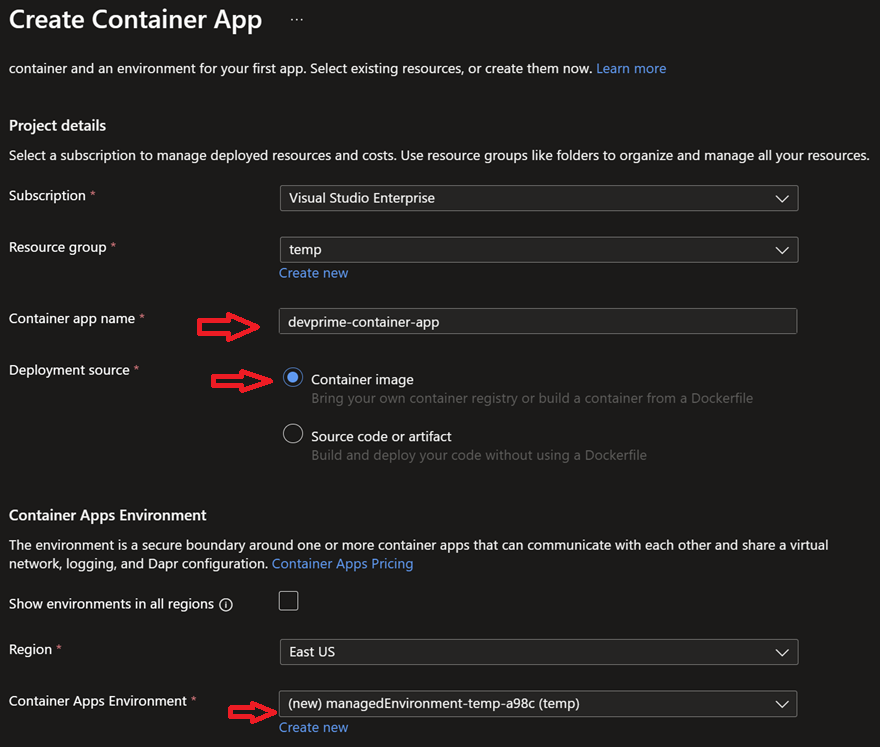
We set the service name to “devprime-container-app” and chose the option to publish via a “Container Image” image. Since this is the first time we’re building the service, we’ll need to co-create a “Container Apps Environment.”
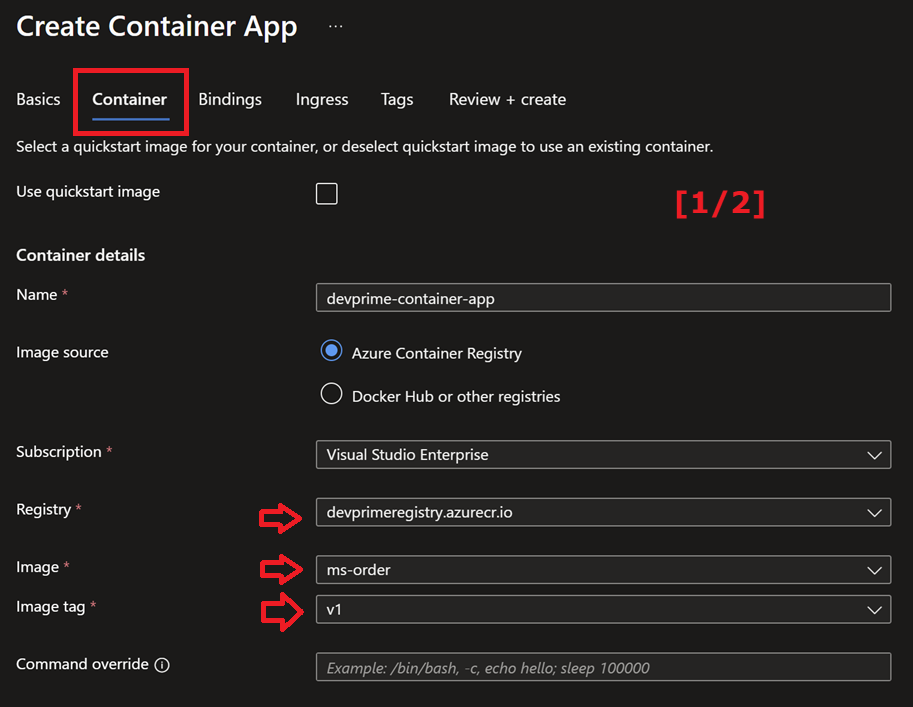
After advancing on the previous screen, locate the “Container” tab. You will have access to some important configurations, such as the “Image Source” definition, where we find our Azure Container Registry with the name “devprimeregistry” and the microservice image previously submitted.
In this tab, we find important initial information, such as the type of CPU/Memory and, especially, the previously exported environment variables, which must be entered using the key/value model.
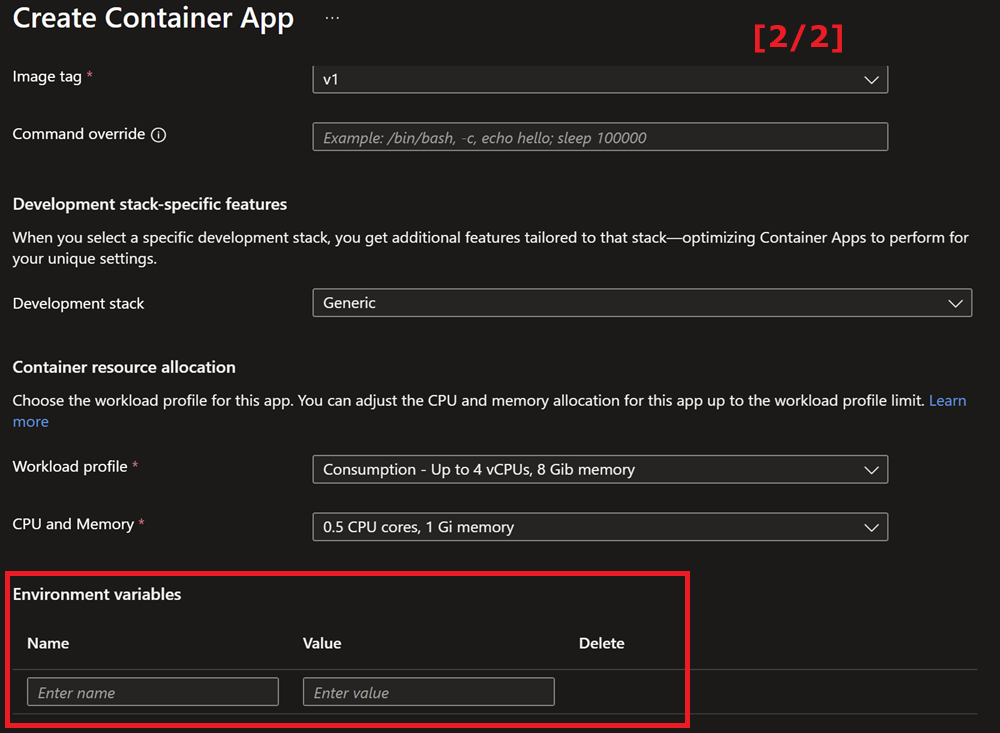
At this point, we apply the settings to the devprime_app, devprime_web, devprime_observability, devprime_stream1, devprime_state1, devprime_custom, and devprime_services keys. The devprime_security is not being used in this project.
Enabling Ingress in Azure Container App
By following the previous steps, your application will be running and ready to receive external requests. To do this, we’re going to enable the “Ingress” feature, available in the Azure Container App portal under Settings > Ingress. Enable the functionality and choose the “Accepting traffic from anywhere” option, with the “Target port” set to “80”, so that Ingress connects internally with your Container. This port configuration is the same as the one exposed in the dockerfile and the “DevPrime_Web” environment variable.
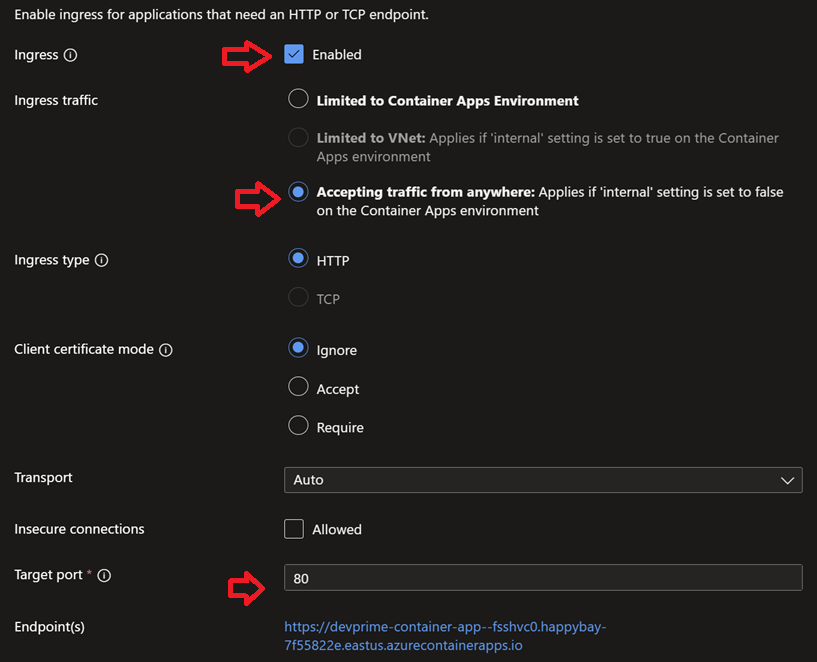
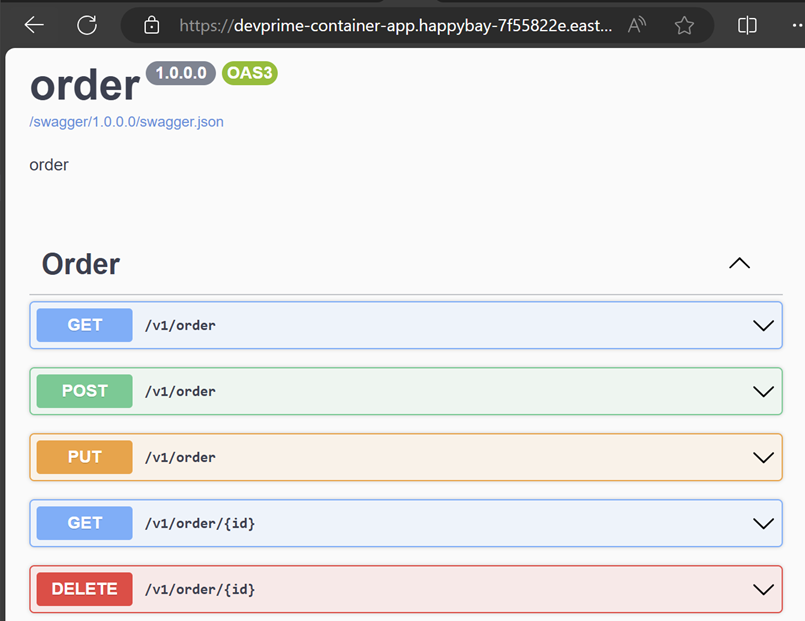
After activating Ingress, a public link will be generated with direct access to your microservice available through Azure Container App.
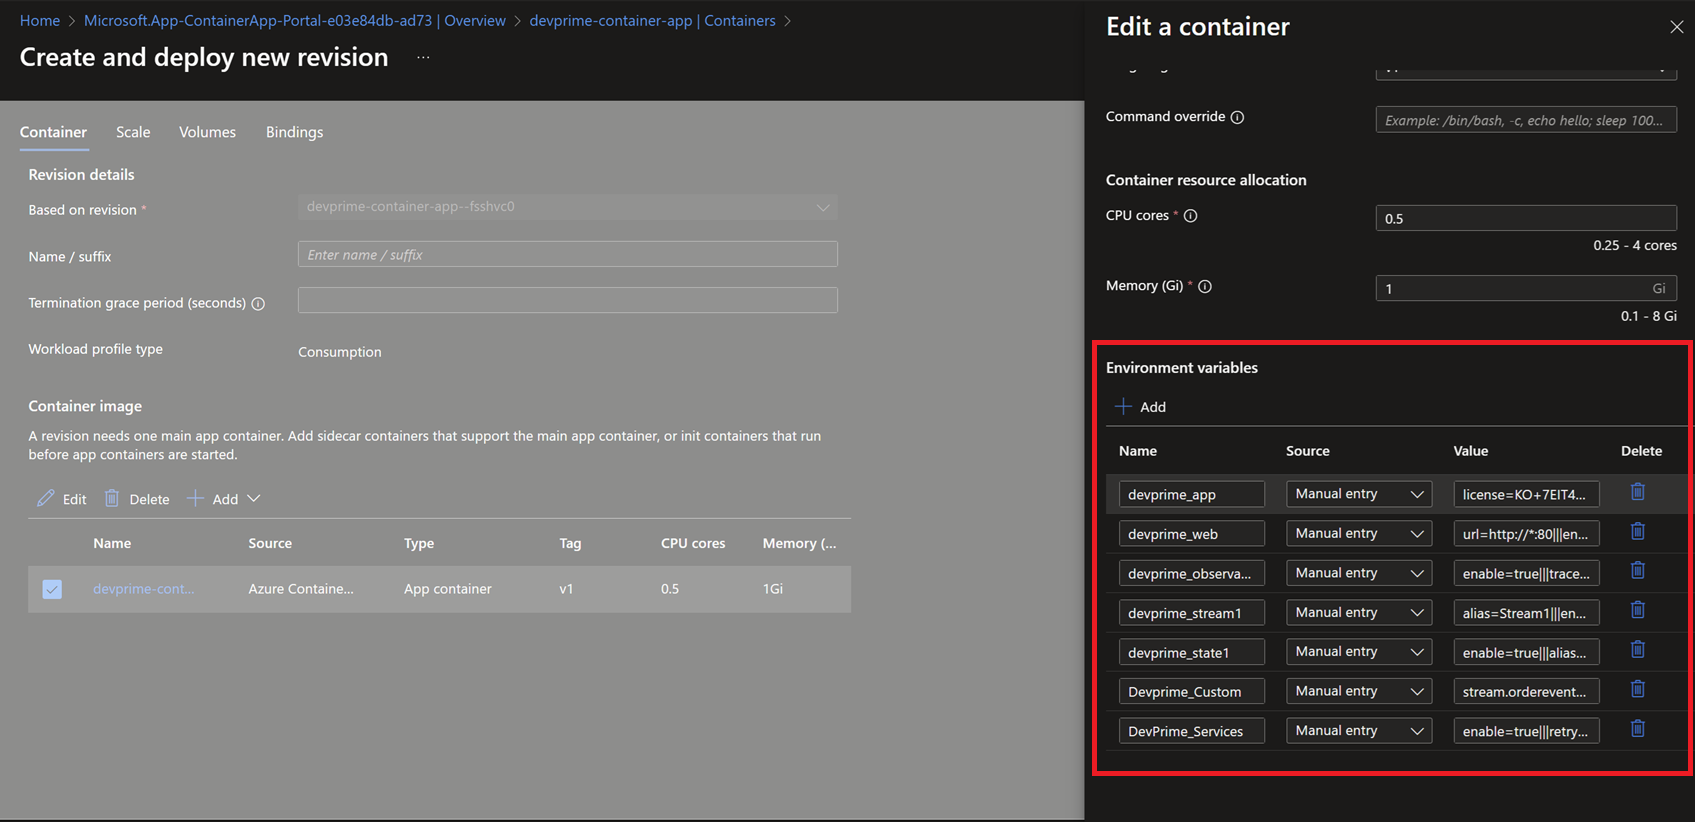
Adjusting the scalability of Containers and environment variables
After running the standard procedure through the portal, if you want to adjust the scalability of the available replicas, you can set it to “zero” and run fully as serverless. Another important point is to update other parameters, such as the environment variables themselves. To modify them, go to the “Application > Containers” menu.
Congratulations! 🚀 You’ve just deployed a microservice built with Devprime platform accelerators on Azure Container Apps.
Suggestion for next steps
- Automate this process using Azure DevOps, Github…
- Add a security setting in the API display
- Add an Azure API Management service
- Add an Azuer Key Vault
To learn more:
Last modified August 20, 2024 (2f9802da)