Introduction
Keycloak is an identity management platform that supports application and microservices security in single sign-on processes with Identity, Access Management offering authentication and authorization integrated with the Devprime platform. This integration is done by the Security adapter.
Follow the steps below to prepare the local Keycloak environment with the basic settings to enable local integration testing with the security engine.
- Initialize the Keycloak container using the command provided in the docker documentation.
- Open the Keycloak url in http://localhost:8080 and view the Keycloak portal.
- Log in by entering the user ‘admin’ and password ‘admin’.
- Create a new Realm and set a name. In this example we will use ‘devprime’.
- Configure some initial settings to allow user registration and use of email at login. To find this setting go to the Realm “Devprime” and locate the ‘Realm settings’ menu.
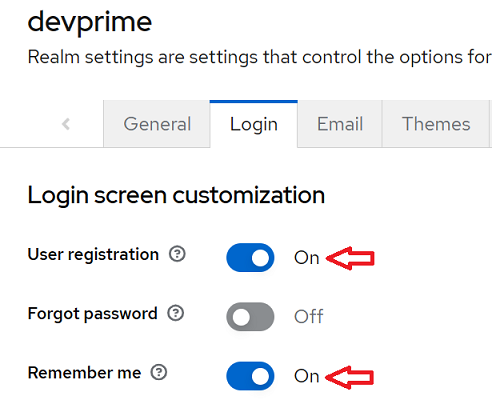
a) Locate the “Login” menu and enter the “Login screen customization” option and change it.
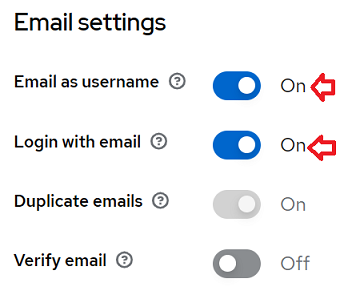
b) Locate the “Email settings” option and change it.
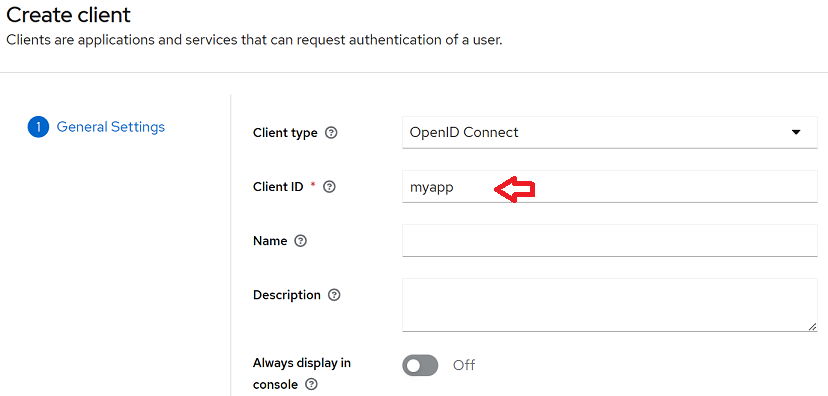
- At this point we will create a “Client” to allow microservice access to Keycloak. In the main menu locate the “Clients” item and choose the “Create client” option.

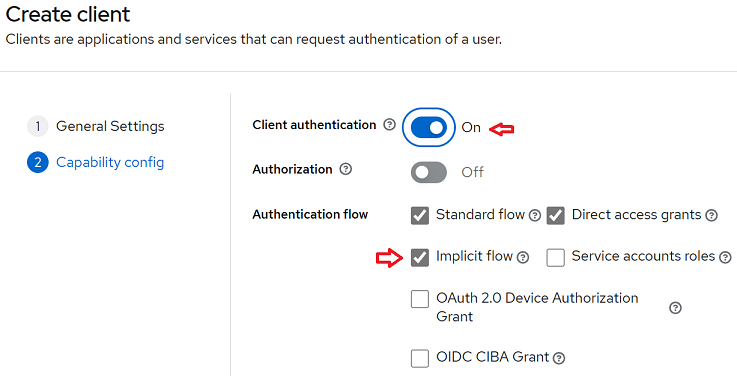
- Make an initial configuration by informing the “Client ID” and other settings according to General Settings and Capability config. In our example we use the name “myapp” for ClientID and change the Client authentication and Implicit flow.
First step of the setup
Second step of the setup
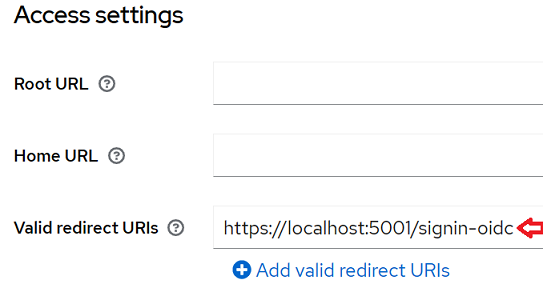
- To allow url redirection between Keycloak and the microservice, it is necessary to register valid urls.
a) If you have the screen open from the previous step, locate the option “Access settings”
b) Add the url “https://localhost:5001/signin-oidc” in the Valid redirect URIs option.
c) This same screen is available in the main menu under “Clients” / “myapp”.
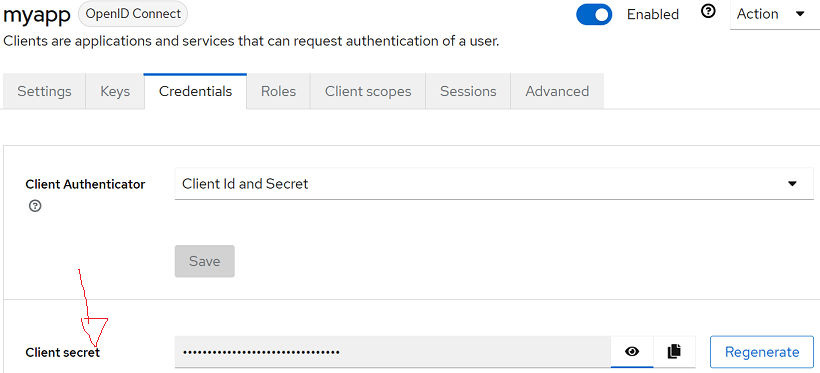
- To obtain the microservice integration credentials with Keycloak go to the “Clients” menu and then enter “myapp” to locate the “Credentials” tab. Copy the secret key for use in your application.
This initial configuration will allow you to start the first tests on the security configuration in the microservices. Keycloak offers several options for authentication flows.
At the end, remember the parameters used and/or obtained in the configuration of the keycloak for use in the microservice. The Logout url below is an example returning the redirect to localhost
Another important option to configure is “Valid redirect URIs” which defines the authorized urls. In our scenario we are using localhost in the local environment. You must register all urls or you can use the example “https://localhost:5001/*”.
| Item | Parameter |
|---|---|
| Domain | https://localhost:8080/auth/realms/devprime |
| ClientID | Your ClientID |
| ClientSecret | Your Secrets |
| LogoutUri | https://localhost:8080/auth/realms/devprime/protocol/openid-connect/logout?redirect_uri=https%3A%2F%2Flocalhost%3A5001 |
| Valid redirect URIs | https://localhost:5001/signin-oidc |
Common Error:
- Verify the ClientID name and credential
[ERR][Web]["HTTP"][System.Exception]["Microsoft.AspNetCore.Authentication"]
["An error was encountered while handling the remote login." "An error was encountered while handling the remote login.
Message contains error: 'unauthorized_client', error_description: 'Invalid client or Invalid client credentials', error_uri: 'error_uri is null'."]
Next steps:
Last modified August 20, 2024 (2f9802da)