Building a microservice
Today you will learn in practice how to use the Devprime platform to accelerate the development of the first microservice. We will use the Devprime CLI which is Devprime’s tool for the developer with the command ‘dp new’. By executing this command, a new application is created in a matter of seconds, including a complete software architecture design, and is ready for production. This process saves a lot of time compared to conventional breeding, which would normally take weeks.
For the local environment, the ‘RabbitMQ’ Stream service will be used for event emission and asynchronous communication, aligning with our ‘Event-Driven Architecture’ approach and for the database, we have opted for ‘MongoDB’ and will integrate using the State Adapter.
Cheklist e preperação do ambiente inicial:
- Open an account on the Devprime platform and purchase a [(Developer/Enterprise)] license(https://devprime.io/pricing).
- Install an updated version of .NET 7.0 or higher (.NET) on Linux, macOS, and Windows.
- Install and/or update Visual Studio Code and/or Visual Studio 2023 Community / Professional / Enterprise.
- Install and/or update docker (For Windows, use WSL2).
- Initialize the MongoDB and RabbitMQ containers on docker and add the ‘orderevents’ queue in RabbitMQ.
- Install and activate the latest version of the Devprime CLI.
- Create a folder for your projects and set read and write permissions.
Criando o primeiro microsserviço
New projects are created using the dp new command with parameters for defining the Stream, which can vary between RabbitMQ, Kafka, and other options, and the State, which can vary between MongoDB, MySQL, SQL Server, and other choices.
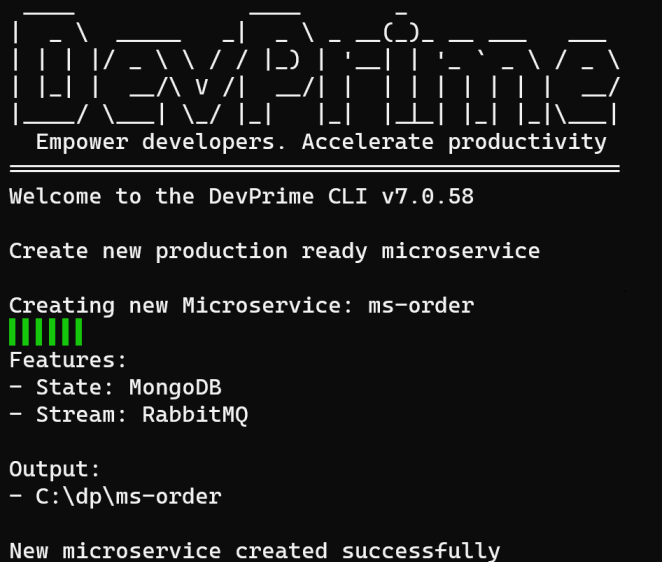
To start a new microservice project, run the command below, setting the microservice name to “ms-order” and specify the parameters for RabbitMQ and MongoDB:
|
|
This command will create a new microservice called “ms-order” with the appropriate settings to use RabbitMQ in the Stream and MongoDB in the State.
Your new microservice is ready for production
To access the new project, go to the folder you created and open Visual Studio Code to view the implemented software architecture, functionality enabled by accelerators, and components of the Devprime platform.
|
|
The settings of the features offered by Devprime Stack are available in the appsettings file (src\App\appsettings.json) and can be configured via environment variables in the container and a vault vault in the production environment.
The project follows a Hexagonal architecture approach separating the technology layers as follows:
- APP: Your app’s core project and the default to open in Visual Studio.
- Domain: Business rules are based on Domain-Driven Design (DDD) and are isolated in that design. All domain classes must inherit from Devprime Foundation classes (AggRoot, Entity, ValueObject).
- Web: API display adapter.
- Stream: Adapter with implementation to receive multistream events (RabbitMQ, Kafka, etc.).
- State: Adapter with integration with persistence platforms (MongoDB, SQLServer, PostgreSQL, etc.).
- Services: Adapter for integration with external API services, whether using HTTP, gRPC, or GraphQL.
- Security: Adapter for integration with identity providers, including authentication and authorization for API protection.
- HealthCheck: Exposure to check the availability of services in the Cluster (Liveness, Readiness).
- Observability: Adapter with observability strategies, including logging, tracing, metrics, and OpenTelemetry support for use in Distributed Tracing.
- AppCenter: Adapter for exposing information for monitoring services.
- Extensions: Extensibility adapter for adding external third-party NuGet components.
The new “ms-order” microservice application can be executed even without the business rules. In the microservice context, the log is the canvas of your application, and Devprime provides an amazing viewing experience, generating the log automatically using the ‘Observability’ adapter. This log, in addition to being automatic, is distributed, allowing integration with processes between microservices.
Starting the “Order” microservice
You can run the application using dotnet run --project .\src\App\App.csproj -c release or using the script files “.\run.ps1” if you have powershell (Windows, Linux, macOS) installed, or “./run.sh” in bash (Linux and macOS).
chmod permission on Linux, macOS
To run the “.sh” file on (Linux, macOS) it is necessary to add the permission below making the script executable.
chmod +x run.sh
Start the microservice by running one of the scripts below:
.\run.ps1 (Windows) ou ./run.sh (Linux, macOS)
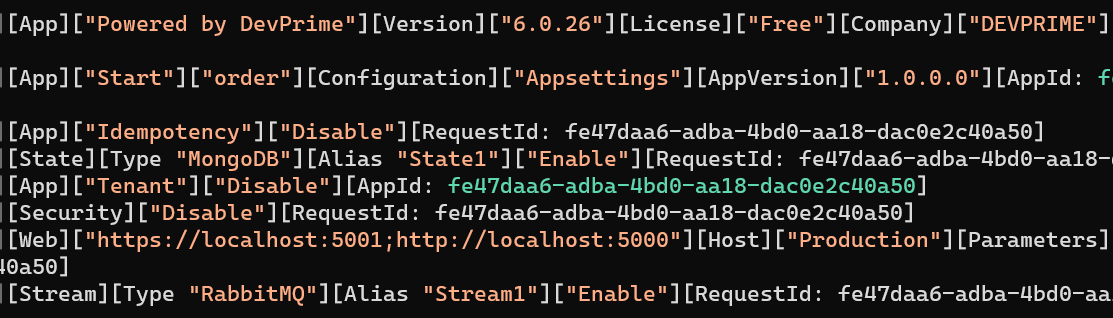
When starting the application, it is possible to follow in the log below all the behavior of the new microservice.
Introduction to resilience and circuit breaker
The Devprime platform offers automatic strategies for distributed systems, including features such as Retry, Circuit Breaker, and Resiliency through the Devprime Stack components.
During microservice startup or at any point in its operation, failures are common. If you don’t have a RabbitMQ container service running locally or configured correctly in the “src/App/appsettings.json” file, the adapter will automatically initiate a “Retry” attempt. If it is unsuccessful, it will trigger the “Circuit Breaker” due to problems accessing the RabbitMQ Stream service.
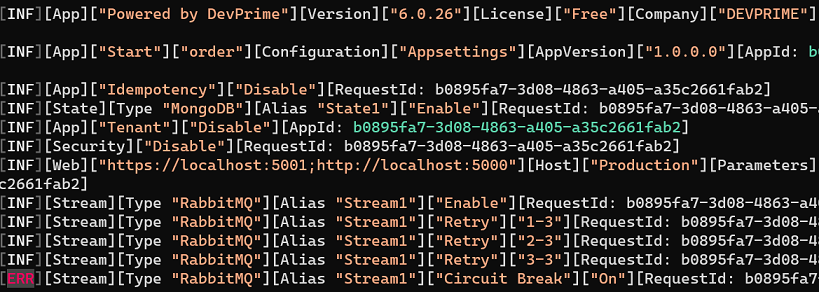
On return from service, it will turn off the “Circuit Breaker” automatically.
Viewing the APIs exposed in the microservice
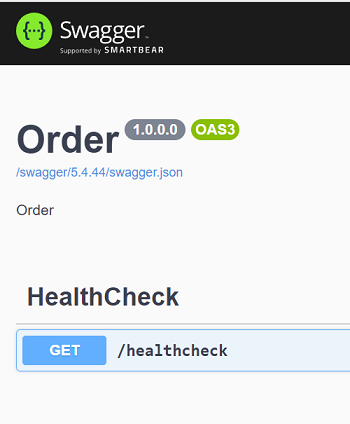
When you run the new microservice that has been created, you will already have access to the http://localhost:5000 or https://localhost:5001 URLs through the Web Adapter. This allows you to view the API exposed in the OpenAPI/Swagger pattern. However, because the business rules have not yet been implemented, the only available endpoint is /healthcheck, which is used by the Kubernetes cluster to monitor the service.
Adding a Business Rule
The created project is already ready to receive the business rules in the standard Domain Driven Design (DDD). The code must be written inside the Domain folder. After including it, it is possible to use the “dp init” accelerator to analyze the domain and create the necessary code for API exposure, further simplifying the development journey, in addition to maintaining the best development practices.
To facilitate our example, we will use the “Order” domain and obtain the example code of the Devprime platform marketplace service. Use the command below and check the result in the Domain src/Core/Domain/Aggregates folder.
dp marketplace order
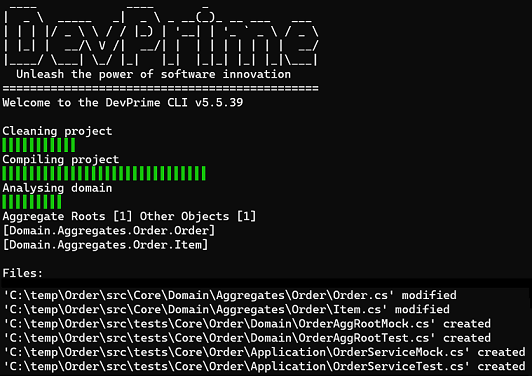
Next, we will use the “dp init” command that allows us to analyze the business rules in the “Domain” and using the best development practices build the necessary code to allow propagating a business interaction with other layers of the application, maintaining decoupling, standardization and testability, saving many hours of development.
The accelerator automatically implements the classes of “Domain Events” in Domain, Event Handlers in Application, “Domain Services” in Application, “Application Services” in Application, persistence in State, “API’s/Controllers” in Web, unit tests in Tests.
To use it, you just need to have a domain implemented and run the command as shown in the example below.
dp init
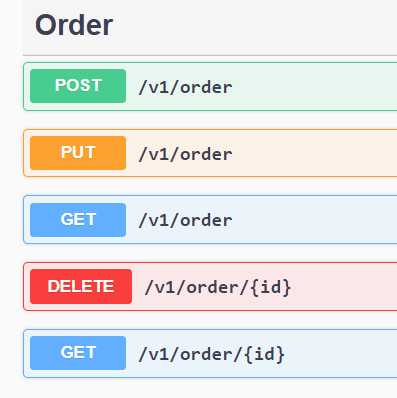
Now when you run the ‘ms-oder’ microservices again you will already have a set of API’s as shown below
and you can now, for example, make a post to the API and track all the result of the microservice working and ready for production.
Last modified November 20, 2024 (61099f59)WOW!! You already have a production-ready microservice based on Devprime