Introduction
Auth0 is an identity management platform that supports application and microservices security in single sign-on processes with Identity, Access Management offering authentication and authorization integrated into the Devprime platform. This integration is done by the Security adapter.
Follow the steps below to prepare the on-premises environment and perform basic coconfigurations in Auth0 to enable on-premises integration testing with the security mechanism.
Checklist and preperation of the initial environment:
- Open an account on the Devprime platform and purchase a [(Developer/Enterprise)] license(https://devprime.io/pricing).
- Install an updated version of .NET (Linux, macOS, and Windows)
- Install and/or update Visual Studio Code and/or Visual Studio 2023 Community / Professional / Enterprise.
- Install and/or update docker (For Windows, use WSL2).
- Initialize the MongoDB and RabbitMQ containers on docker and add the ‘orderevents’ queue in RabbitMQ.
- Install and activate the latest version of the Devprime CLI.
- Create a folder for your projects and set read and write permissions.
- See the article “Creating the First Microservice” to explore getting started with the Devprime platform.
- Create a Host account on Auth0.com.
Creating an Application in Auth0
After creating the account on Auth0 you will be directed to a private area within the portal with several options for configuration. The first option to be located is the “Applications” menu and then the “Create application” option and you must provide a node as “ms-order” and the type as “Regular Web Applications”
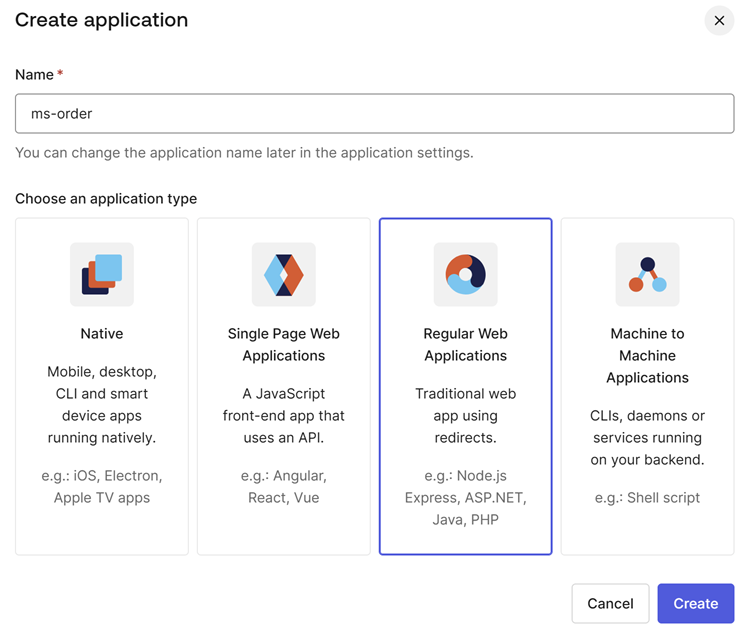
At the end a new “Application” will be created and we will perform some configurations and then use the data in the local microservice to validate the authentication.
Getting an Application’s Settings in Auth0
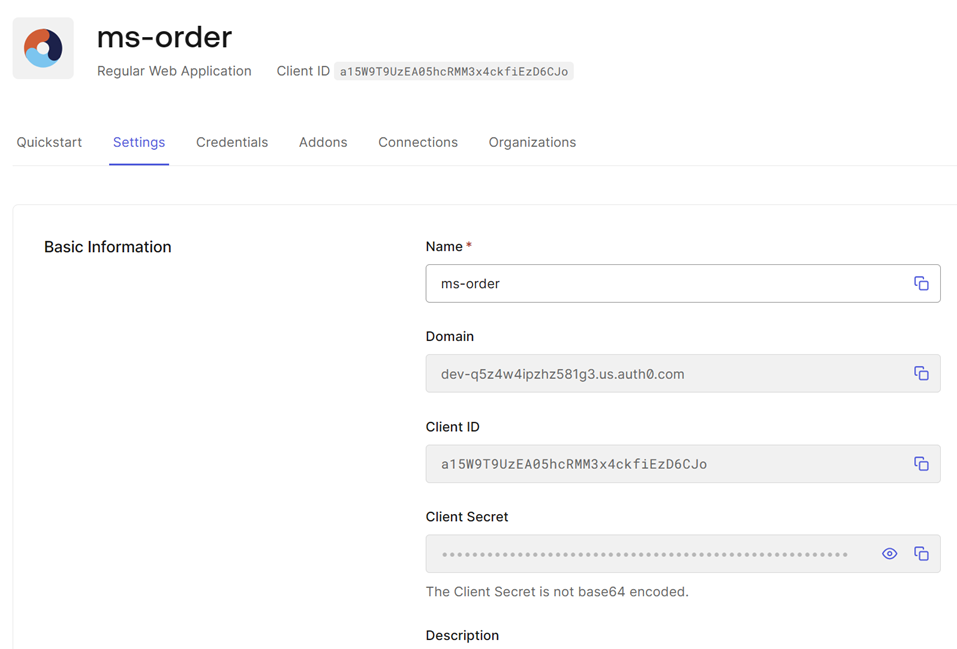
Now it’s time to get the Auth0 configuration information for use in our application and for that it is necessary to access the “Application > ms-order” and in the option
“Basic Information” get the values of “Domain, Client ID, Client Secret”
| Item | Value |
|---|---|
| Domain | dev-q5z4w4ipzhz581g3.us.auth0.com |
| Client ID | a15W9T9UzEA05hcRMM3x4ckfiEzD6CJo |
| Client Secret | -hQtloE4YIF4oJD5cbhDrSVjbZ5IlF-x-UPgeTUZLZArxTRcyHwff6eu5b4IpkHZ |
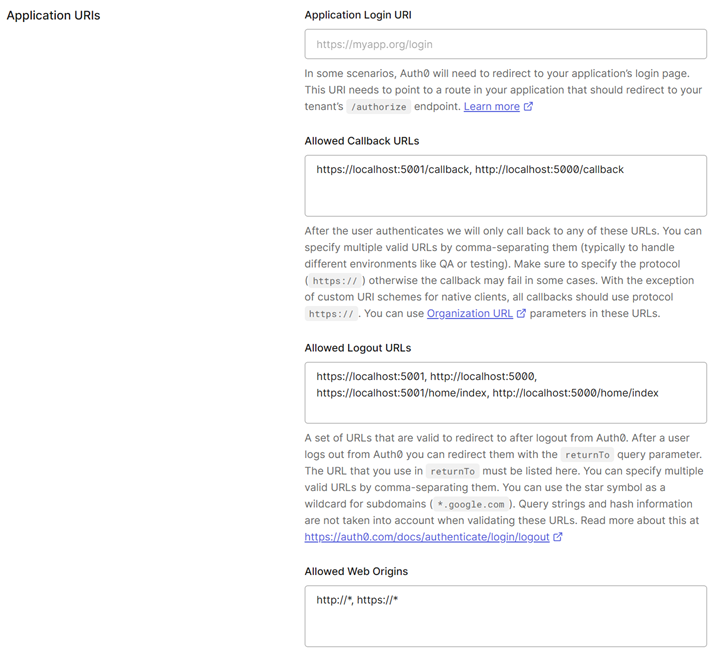
Then locate “Application URIs” locate the keys Allowed Call Backurl, Allowed Logout Backurl and Allowed Web Origins and include the values shown in the table
| Item | Value |
|---|---|
| Allowed Call Backurl | https://localhost:5001/callback,http://localhost:5000/callback |
| Allowed Logout Backurl | https://localhost:5001, http://localhost:5000, https://localhost:5001/home/index, http://localhost:5000/home/index |
| Allowed Web Origins | http://*, https://* |
In the same form you will find the option “Cross-Origin Authentication”
which can also be filled with the values “http://*, https://*”.
This is the important moment that needs to save the settings made in the
Auth0.
Next steps:
Last modified August 20, 2024 (2f9802da)