Seq
In our scenario, we used a local instance of Seq run by docker as described in the documentation and two microservices (ms-order/ms-payment).
Follow the steps:
-
Install the Devprime CLI.
-
Initialize the Seq container provided in the docker documentation.
-
Clone the repository with the two microservices (ms-order/ms-payment) or deploy manually.
git clone https://github.com/devprime/devprime-microservices-order-payment.git -
Update the Stack by running in the main folder to detect the two microservices
dp stack -
Locate the configuration file in the folder of each microservice “appsettings.json” and edit as instructed below.
a) Open the configuration file in each microservice’s folder (ms-order/ms-payment) as per the command below or directly from Visual Studio Code.
code src/App/appsettings.json
b) Locate the Observability key and verify that the Enable option is true in the primary key and the Log option. Locate the key ShowAppName and HideDateTime and set to true to show the name of the microservice and indicate the date and time since Seq will automatically include it.
c) Locate the Export option and set the Enable to true, Type to seq and the Endpoint to the url of the service that in the local docker url has the default value of “http://localhost:5431”. In this scenario, we will not provide the value of the Apikey, which is a Seq protection key.
|
|
To make it easier to view the logs in the Seq tool, we’ll hide the date-time of the logs and enable the display of the names of each microservice.
Tracking the log distributed across two or more microservices
- Run both microservices (ms-order / ms-payment) at the same time
- Open ms-order in the browser in http://localhost:5000 and make one or more posts in /v1/order
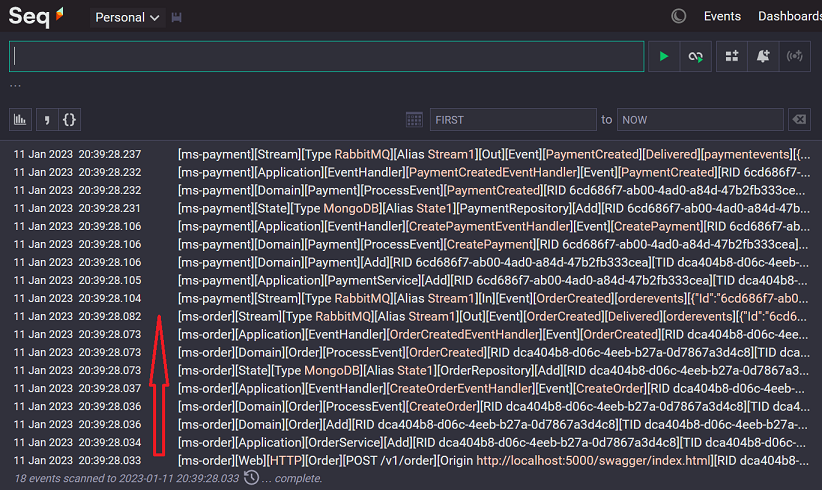
- Open Seq in the browser in http://localhost:8000 and view the logs
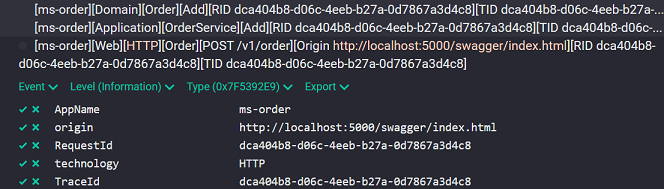
- Viewing the Detail of a Particular Log
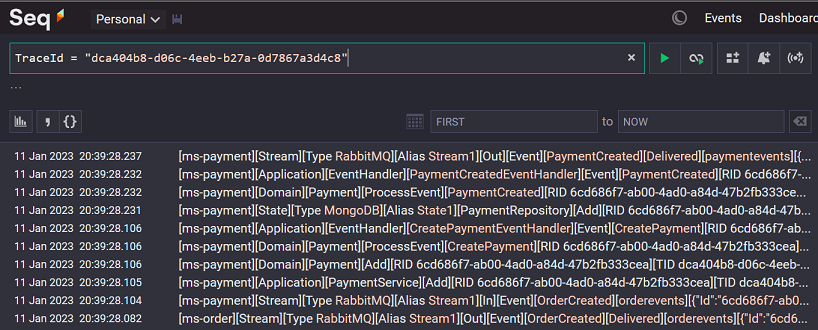
- Filtering logs related to a Trace ID
Legal information:
Seq is a product of [Datalust and licensing must be contracted directly with the manufacturer.